Programming the ODROID-GO: Text (Part 7)
With the ODROID-GO layer wrapped up, we can begin to write code for the actual game.
We’ll start with drawing text to the screen because it’s a gentle introduction to a few topics that will serve us well later.
This post will be slightly different than the others in that there will be very little code added that will run on the ODROID-GO. The bulk of the code will be for our first tool.
Tiles
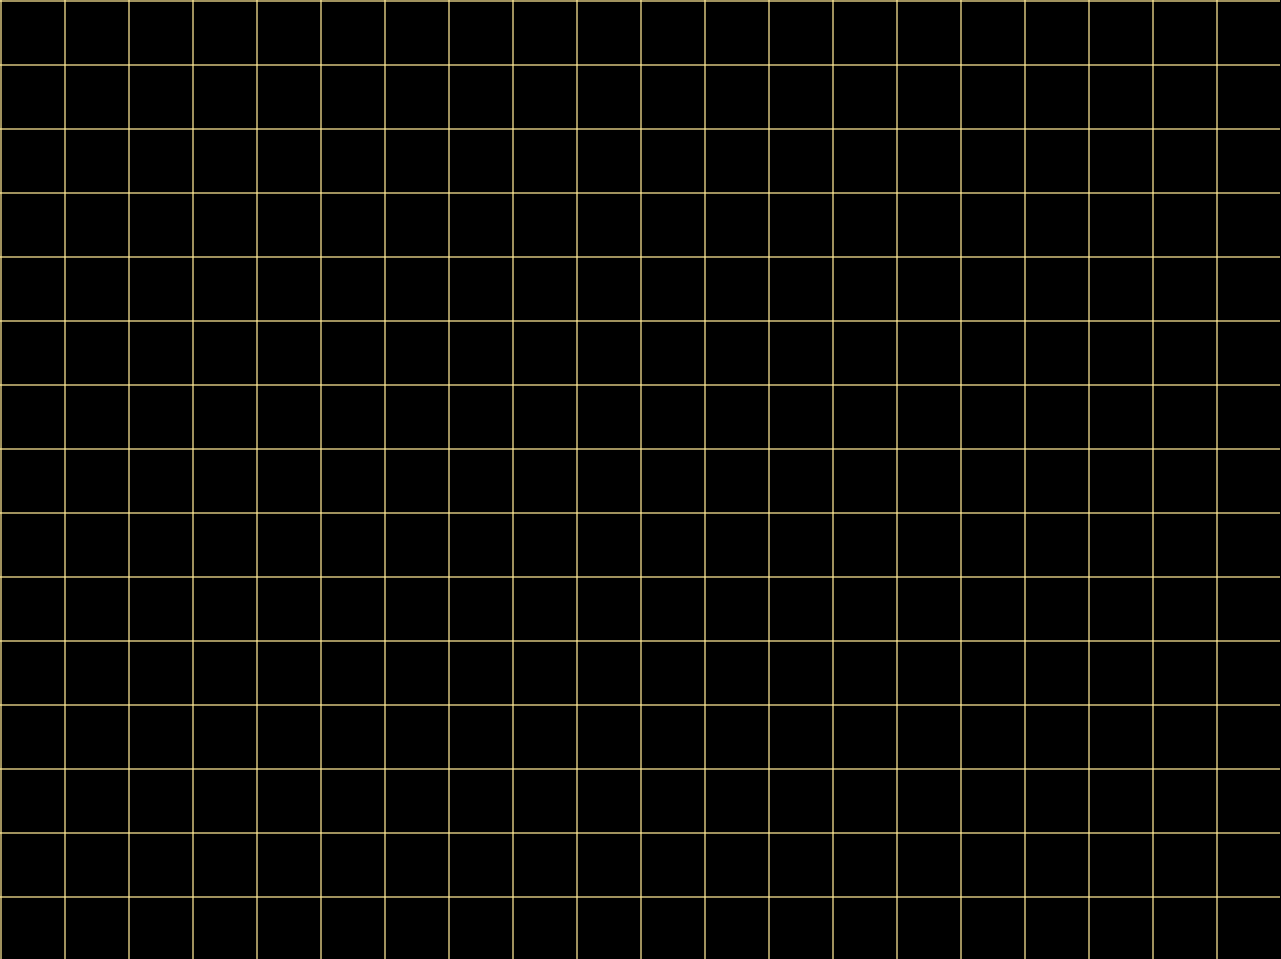
We’re going to use tiles for part of our rendering system. We’ll break our 320x240 screen up into a grid of tiles, each tile containing 16x16 pixels. That gives us a width of 20 tiles and a height of 15 tiles.
We’ll set everything up so that static things like backgrounds and text will be rendered using the tile system, and dynamic things like sprites will not be. That means that backgrounds and text will only be able to be placed in fixed locations while sprites can be anywhere on the screen.

A single 320x240 frame will contain 300 tiles as shown in the (scaled) image. The yellow lines indicate the separation between the tiles. Within each tile will be a texture character or a background element.

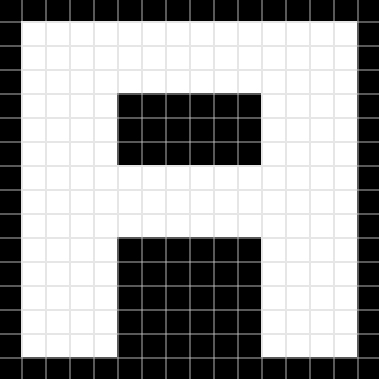
A zoomed-in view of a single tile shows the 256 pixels comprising it with gray lines indicating the separation between pixels.
The Font
In desktop font rendering, the common approach is to select a TrueType font and use that for your text. Within the font are glyphs representing characters.
To use the font, you would load it with a library (e.g., FreeType) and create a font atlas which contains all of the required glyphs pre-rasterized to a bitmap that could then be sampled when rendering. This would generally happen offline rather than in the game itself.
In the game, there would be a single texture in GPU memory with the rasterized font and a description in code somewhere that would specify where in the texture a glyph could be found. Rendering the text would then be a matter of drawing the glyph’s portion of the texture onto a simple 2D quad.
However, we’ll take a different approach. Rather than wrangle TTF files and libraries, we’ll design our own simple font directly.
The point of a traditional font system like TrueType is to allow a font to be rendered at any size or resolution with no changes to the original font file. This is accomplished by describing the font with mathematic expressions.
But we don’t need that flexibility. We know the resolution of our display and we know how big we want our text to be. We can instead rasterize our own font directly by hand.
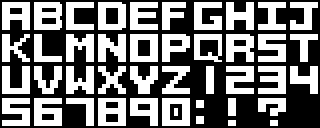
To that end, I created a simple font of 39 characters. Each character fills a single 16x16 tile. I’m no typographer, but it works well enough.

The original image is 160x64, but the image above is scaled 2x for easier viewing.
Encoding a Glyph

Looking at an example of the glyph “A”, we can see that it’s made up of sixteen rows of sixteen pixels. In each row, the pixel is either on or off. We can use that feature to encode a glyph without needing to load a font bitmap into memory in the traditional way.
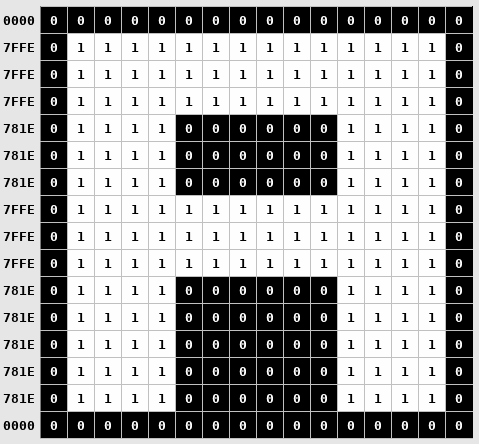
Each pixel in a row can be thought of as a single bit so a row is 16 bits. If the pixel is on, the bit is set. If the pixel is off, the bit is not set. An encoding of the glyph can then be stored as sixteen 16-bit integers.

Using that scheme, the letter “A” is encoded like the above image. The numbers on the left show the line’s 16-bit value.
A full glyph is encoded with 32 bytes (2 bytes per row x 16 rows). All 39 characters take 1248 bytes to encode.
A different approach would be to put the image file on the SD card of the ODROID-GO, load it into memory during initialization, and then reference it whenever text was rendered to find the desired glyph.
But the image file would need to use at least one byte per pixel (0x00 or 0x01) so the smallest possible image size (without compression) would be 10240 bytes (160 x 64);
In addition to saving memory, this method also makes it fairly trivial to hardcode the font glyph byte arrays into our source code directly so that we don’t have to load them from a file at all.
The Importance of Writing Tools
A game must run in real-time at a rate of at least 30 frames per second. That means that all of the game’s processing must be able to complete in 1/30th of a second: approximately 33 milliseconds.
To help achieve that goal, it’s good to do as much offline pre-processing of data as possible so that the data can be used by the game without it needing to do any processing on the fly. It also helps save on memory and storage space.
There is often some sort of asset pipeline in place that can take the raw data exported from a content creation tool and massage it into a form better suited for running inside of the game.
In the case of our font, we have a character set created in Aseprite which will be exported to a 160x64 image file.
Rather than load the image into memory when the game runs, we can instead create a tool to transform the data into the more space- and runtime-efficient form described in the previous section.
Font Processing Tool
For each of the 39 glyphs in the source image, we must convert them into byte arrays that describe the status of the constituent pixels (like in the example for the character “A”).
We can put the array of pre-processed bytes into a header file that is compiled into the game and placed in its flash space. The ESP32 has much more flash than RAM, so we can take advantage of that by compiling as much into the game’s binary as possible.
We could do the pixel-to-byte calculations by hand and that would be manageable (but annoying) the first time. But as soon as we want to add a new glyph or tweak an existing one, it becomes tedious and time-consuming and error-prone.
This is a good use case for creating a tool.
The tool will load an image file, generate the byte arrays for each of the characters, and write them out to a header file that we can compile into the game. If we want to tweak the font glyphs (which I’ve done many times) or add a new one, we just run the tool again.
The first step is to export our glyph set from Aseprite in a form that is easy to read with our tool. We’ll use the BMP file format because it has a simple header, it does not compress the image, and it allows for encoding an image with 1-byte per pixel.
In Aseprite, I created a palette-indexed image, so each pixel’s value is a single byte representing an index into a palette containing only black (Index 0) and white (Index 1). The exported BMP file keeps the encoding: a pixel that is off has the byte 0x0 and a pixel that is on has the byte 0x1.
Our tool will take five parameters:
- The BMP exported from Aseprite
- A text file describing the glyph layout
- The path of the generated output file
- The width of each glyph
- The height of each glyph
The glyph layout description file is needed to map from the visual information in the image to actual characters in the code.
The description for the font image we exported looks like this:
| |
It must match the layout in the image.
| |
The first thing we do is some simple command-line argument checking and parsing.
| |
The image file is read in first.
The BMP file format has a header that describes the contents of the file. In particular, we care about the width and height of the image and the offset into the file where the image data begins.
We create a struct specifying that header layout so that we can load the header and access the needed values by name. The pragma pack ensures that no padding bytes are added to the struct so that when we read the header from the file it will align correctly.
The BMP format is a bit strange in that the bytes after offset can vary depending on what version of the BMP spec is followed (Microsoft has updated it many times). headerSize is how you check which version of the header is being used.
We check that the first two bytes of the header are BM because that indicates that it’s a BMP file, and we ensure that the bit depth is 8 because we’re expecting each pixel to be a single byte, and we also check that the header size is 40 bytes because that indicates that the BMP file is the version that we expect.
The image data is loaded into imageBuffer after calling fseek to go to the location of the image data specified by offset.
| |
We read in the glyph layout description file into an array of strings which we’ll need in the subsequent sections.
We first count the number of lines in the file so that we know how much memory to allocate for the strings (one pointer per row), then we read the file into memory.
Newlines are trimmed so that they don’t add to the character length of a string.
| |
We generate a function called GetGlyphIndex that takes in a character and returns the index of that character’s data in our (soon-to-be generated) glyph map.
The tool iterates through the layout description read in earlier and generates a switch statement that maps from character to index. It allows for lowercase and uppercase characters to map to the same value, and generates an assert if a character is attempted to be used that does not have a character in the glyph map.
| |
Finally we generate the actual 16-bit values for each of the glyphs.
We go through the description characters from top-to-bottom, left-to-right, and then create sixteen 16-bit values for each glyph by looping over their pixels in the image. If the pixel is set, it puts a 1 in that pixel’s bit position, otherwise it’s a 0.
The code of the tool is unfortunately a bit ugly due to all of the calls to fprintf but hopefully it’s clear enough what’s going on.
The tool can then be run on the exported font image file:
| |
And it generates the following (abbreviated) file:
| |
This results in a function that is slower than I wanted. When testing text rendering with a lot of strings, the framerate drops significantly due to this function.
However, the game we create won't be very text-heavy at all, so the performance should be okay.
An alternative approach might be a hash map that maps from char to int but I don't want to have to implement a data structure like that at this point.
Drawing Text
With our font.h file containing the byte arrays for our glyphs, we can draw them to the screen.
| |
Because we did most of the heavy-lifting in the tool, the actual code to draw text is fairly simple.
To render a string, we loop through its constituent characters and skip it if it’s a space.
For each non-space character, we get the glyph index in the glyph map so that we can get its byte array.
To check the pixels of the glyph, we loop over its 256 pixels (16x16) and check the value of each bit in each row. If the bit is set, we write the color in the framebuffer for that pixel. If it isn’t, we do nothing.
Demo
We’ll test the text rendering by drawing the popular pangram The Quick Brown Fox Jumped Over The Lazy Dog which will use all of our supported characters.
| |
We call DrawText three times so that the strings appear on the different rows, and we increase the tile Y-coordinate on each so that each line is drawn below the other. We also set a different color for each line to test the color.
For now we’re manually calculating the length of the string, but in the future we’ll get around that tedium.

Source Code
You can find all of the source code here.
Further Reading
Last Edited: Dec 20, 2022